In the previous post I mentioned that I wrote code that could automatically update your Firefly III instance as you generate transactions in your UP bank account. In this post I will explain how you can also get the connector running for your own Firefly III instance. This post assumes relative familiarity with servers.
Step 1 – Prerequisites:
- UP Bank account.
- Access to a Firefly III instance (see the official website for guides).
- Access to a computer or server that is always on (from hereon I will refer to server only).
- A static IP for your server or a dynamic ip with a domain name pointing to the current public IP.
- The ability to port forward on your router, or if using a VPS the ability to open a port.
- The ability to access crontab as sudo user on your linux server. If on windows then you should be able to schedule a python script to run.
- Python3 and Flask installed on the server.
These prerequisites might seem like a lot but if you go step by step you will get there in no time. If it is your first time trying something like this perhaps setup Firefly III on one day and then setup the scripts a week later.
Step 2 – Create UP Webhook:
Go to Up API and get access to the API with your app. Once you have access to this you will be able to create a new webhook (you can use cURL on Linux, Google is your friend). Save your UP API token as you will need this in step 4. Up will use this webhook for push notifications every time a new transaction is made. Follow their instructions to create a new webhook. Choose a port not already in use that will receive these requests. By default Flask uses port 5000.
Step 3 – Match UP accounts to Firefly Accounts:
Use the Up API to request all your accounts. Make note of each of your account names and their unique ID’s.
Step 3.1
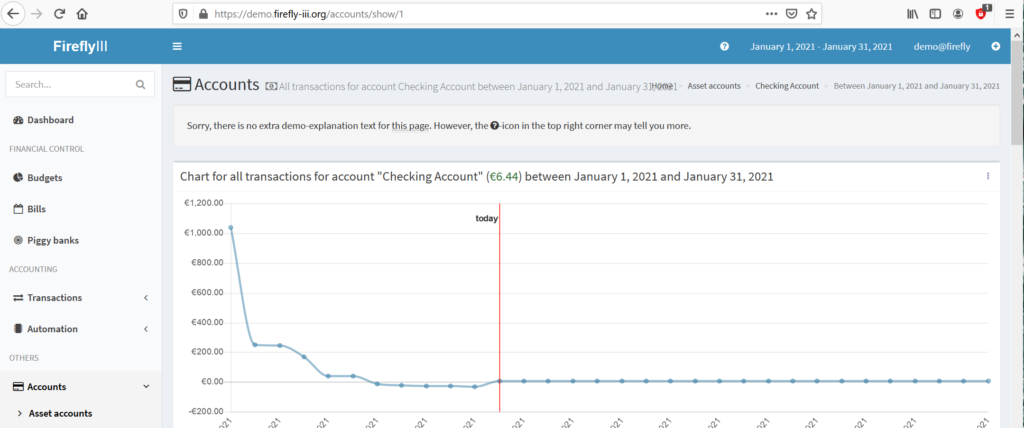
If you already have all your Firefly III accounts created then go to each asset account that reflects one of your UP accounts. Record the unique ID (it is an integer). The screenshot below shows that account 1 is a Checking account. In this instance you want to record a 1 next to the UP ID for your transaction account.

Step 4 – Get and edit the code:
Ensure that Flask and Python3 is installed. Download the two scripts from my github page here, or from the blog here. Move the two *.py files into their own folder where you want the API Connector to run. You need to edit both of these files. Look for the UP Headers, Firefly III URL, your unique Firefly III token and also something called the account matrix. The account matrix converts the UP account ID to the ID used by Firefly.
**Please note that I have hardcoded the Firefly URL in some locations in the code. Please change all such instances to match your URL. I will fix this soon and update this note once improved.
Step 5 – Port forward and run the webhook:
Forward the port that you chose previously to your server. If you chose a non-default port, edit the port in newWebhook.py.
Now on your terminal, navigate to where you saved the *.py files. Type the following commands:
export FLASK_APP=newWebhook.py
python3 -m flask run --host=0.0.0.0
If all went well you will see that the development server is operational. This terminal needs to be left running, or if you know what you are doing you can run it as a daemon.
Step 6 – Crontab:
In another terminal, open crontab with:
sudo crontab -eNow go to the bottom and type:
* * * * * python3 /full/path/to/your/script/transfer_recon.pyEdit the path variable to suit your installation. This will run the script every minute to update Firefly with any transfers made.
Hit control+x to save and exit your crontab.
Step 7 – Success:
If all went well you will now be able to automatically update Firefly III when there’s a new transaction in your UP accounts. Test this by moving money from your savings account to another account. If it shows correctly in your Firefly then it is successful.

Please leave a comment with any feedback, questions or suggestions.